|
ROCHESTER CARBURETORS Bulletin 9D-9 January 1952 |
|||||
|
ROCHESTER PRODUCTS, DIVISION OF GENERAL MOTORS,
ROCHESTER, NEW YORK |
|||||
|
|
|||||
|
FLOAT BOWL ASSEMBLY
(Continued)
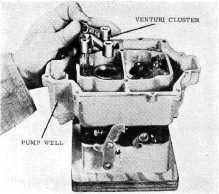
10. Place venturi cluster gasket
in position on pump side of carburetor. Be certain all gasket holes are
properly aligned.
11. Install primary venturi
cluster on pump side of carburetor with three retaining screws and lock
washers. (Figure 7-23.) This cluster contains the pump discharge
nozzles. |
 |
||||
|
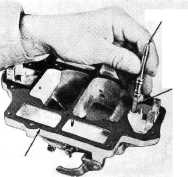
AIR HORN
ASSEMBLY
1. Place air horn gasket in position on air
horn. Be certain all gasket
holes are properly aligned.
2. Assemble; power piston and actuating
spring into air horn cavity.
Rotate retaining washer to hold piston in place. (Figure
7-24.)
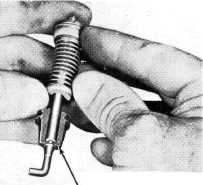
3. Place rubber seal on pump plunger assembly.
Then assemble plunger and seal
in carburetor air horn so that
casting positions in groove on seal. (Figure 7-25.)
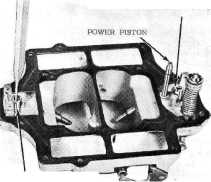
4. Install float balance spring and
clips on pump side of carburetor. (Figure
7-26.)
5. Install fiber gasket and needle seat on
pump side of carburetor.
(Figure 7-26.) |
|||||
|
Figure 7-23 |
|||||
|
AIR HORN
GASKET |
 |
POWER PISTON |
|||
|
POWER PISTON
SPRING |
|||||
 |
|||||
|
Figure 7-24
PRIMARY ASSEMBLY |
|||||
SECONDARY ASSEMBLY |
|||||
|
RUBBER SEAL MUST BE POSITIONED IN
GROOVE ON SHAFT |
|||||
|
|
|||||
|
Figure 7-25 |
Figure 7-26 |
||||
|
|
|||||