1942 - 1947 CHEVROLET SHOP MANUAL
Section 5 - Brakes
|
|
|||
|
5-15 |
|||
|
|
|||
|
Valve adjustments are made in the following
manner:
1. Remove the clevis pin which
fastens the piston rod and valve links to the power and valve operating
levers. Push the piston rod away from the operating and valve
levers. |
If the piston moves toward the
applied position but will not release, the valve is positioned too far out
in the piston rod. To correct the adjustment, remove the piston rod
yoke clevis pin and special bushing and loosen the valve links lock-nut.
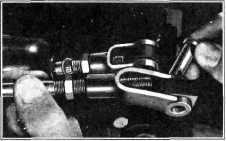
Hold the valve rod with a pair of pliers and turn the valve links 1/2
turn to the left or counterclockwise. Fig. 36.
Reassemble the clevis pin and
bushing and repeat the test. If the 1/2 turn of the valve
links does not correct the condition, repeat the adjustment 1/2
turn at a time until the piston will move in both directions as
outlined in 3 and 4. If the piston moves toward the released position
but will not move in the applied direction, the valve is adjusted too far
into the piston rod. In this case the valve links must be turned 1/2
turn to the right or clockwise until the proper adjustment is
obtained.
Best performance is secured by
turning the valve links 1/2 turn to the right or
clockwise, |
||
 |
|||
 |
|||
|
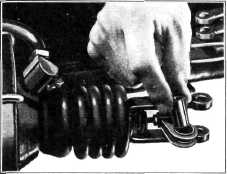
Fig. 34—Installing Adjusting Bushing
2. Start the engine. Place the special
adjusting bushing in position
through the over-diameter bushing in the valve links. Insert the
clevis pin through the piston
rod yoke and adjusting bushing, Fig. 34.
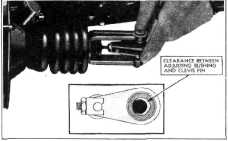
3. Move the valve links away from the cylinder
until the special adjusting
bushing bottoms against the
piston rod yoke clevis pin, having all clearance away from the cylinder, Fig.
35. In this position the
piston rod should move slowly
away from the cylinder, or in the applied position.
|
|||
|
Fig. 36—Adjusting Vacuum Valve
after correct adjustment has been
obtained. This places the valve in a position slightly favoring the
application stroke.
Leverage Adjustment
1. Remove the clevis pin which
fastens the brake pedal rod to the valve operating
lever. |
|||
 |
|||
 |
|||
|
Fig. 35—Checking Vacuum Valve Adjustment
4. Now move the valve links
towards the cylinder with all clearance between the adjusting bushing
and piston rod yoke clevis pin towards the cylinder. In this position the
piston rod should move towards the cylinder, or to the released
position. |
|||
|
Fig. 37-Adjusting Brake Pedal Pull Rod
2. Remove the clevis pin from the
hydraulic main cylinder piston rod yoke and power
lever. |
|||
|
|
|||