|
1951 Chevy Accessories Installation Manual |
||||
 |
||||
|
|
||||
|
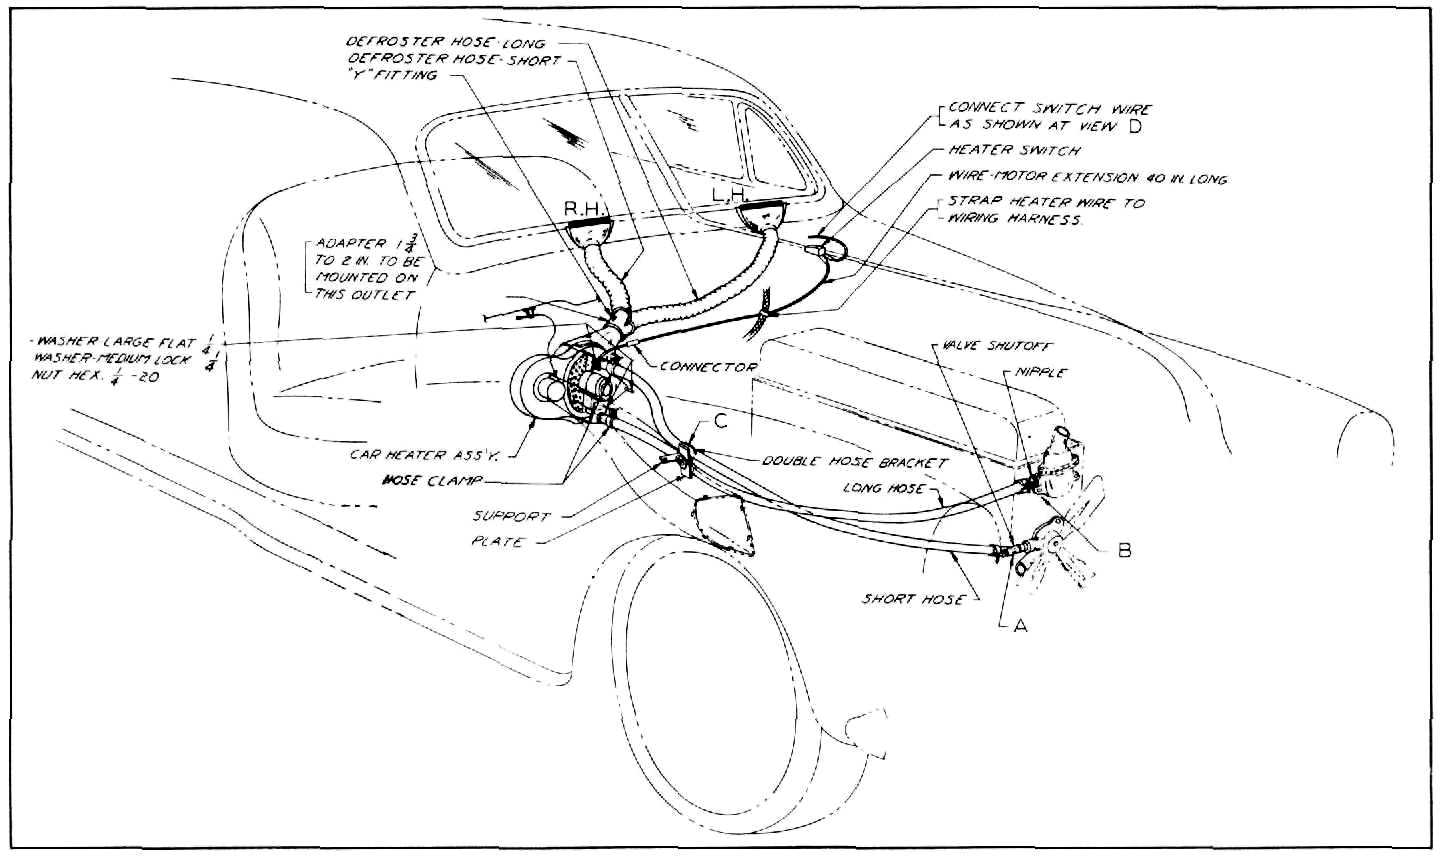
Figure 91 |
||||
|
|
||||
|
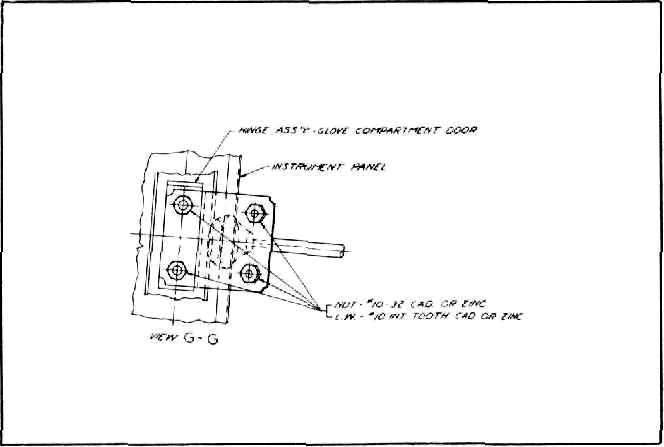
4. Reinstall glove
compartment.
5. Cut necessary holes in dash mat through
punched holes provided in dash
panel.
6. Remove air vent control from present
location and attach to air
vent control bracket,
using present screws (see view "H," figures 88 and
92). |
10. |
rectly to
the 2 inch outlet on "Y" fitting. Attach lower end of right hose to the 1-3/4
inch outlet on "Y" fitting
using the rubber ring adapter.
Mount "Y" fitting on outlet on heater.
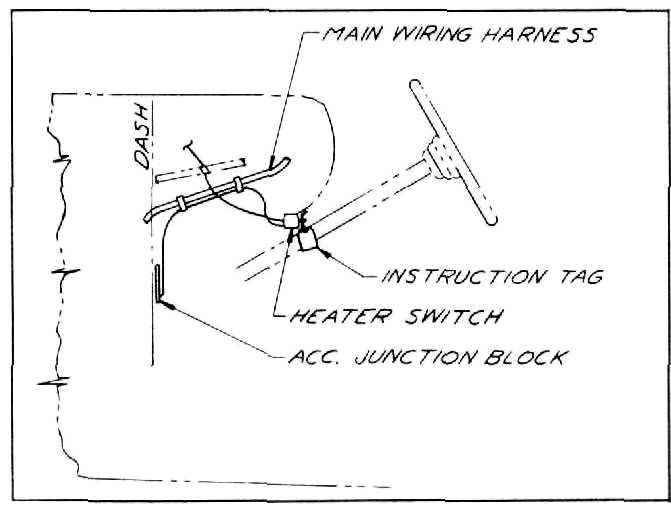
Install
the Heater switch in hole provided on
lower flange of instrument panel to the left of steering column and install and
connect wires as shown in figures 93 and
94. |
||
 |
||||
 |
||||
|
Figure 92
7. Remove the right-hand ventilator deflector
and attaching nuts on passenger
side of dash. These parts are
not required.
8. Install heater using attaching washers and
nuts
furnished.
9. Attach lower end of left defroster hose
di- |
||||
|
Figure 93
11. Drain
radiator and remove plugs from engine at "A" and "B," figure 91. Install
nipple |
||||
|
|
||||
|
35 |
||||
|
|
||||