1942 - 1947 CHEVROLET SHOP MANUAL
Section 1 Body
|
|
|||
|
1-22
|
|||
|
|
|||
 |
move the handle retaining nut on the underside of
the lid, pull the handle straight
out, then remove the four
screws attaching the lid lock to the lid.
SEATS
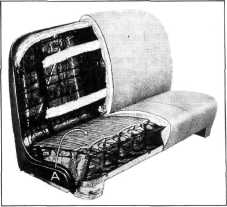
The construction of the front and rear seats and method of trimming
the seats is shown in Fig. 48. The
seat cushion spring insulator is shown at "A" in this same
figure.
|
||
 |
|||
|
Fig. 46-Rear Compartment Lid Loch—Unlocked
|
|||
 |
|||
|
Fig. 48-Seat Cushion and Back Construction
Front Seat Removal
1. Remove
the seat cushion by lifting up at the
front end and pulling it out of
the seat frame. Remove the
seat adjuster control handle at the
left end of the seat frame.
2. Disengage
the double-locking connector rod
from the retainer on the
underside of the seat
frame.
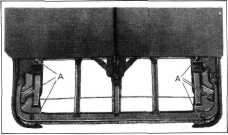
3. Remove
the bolts attaching the bottom of the
seat frame to the adjusters, "A"
in Fig. 49. Slide the seat
assembly to the driver side, to clear the control shaft, and lift out
of the car.
|
|||
 |
|||
|
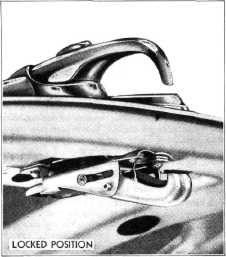
Fig. 47-Rear Compartment Lid Lock-Locked
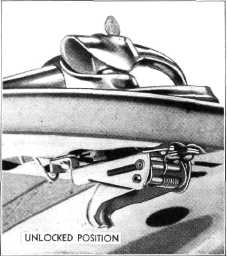
firmly against its seal. Figure 47 shows the locked position of the
lock striker.
This lock is a rivited-together assembly, held to
the underside of the lid by four
slotted head screws. To
remove the assembly it is only necessary to
turn the lid handle to the
unlocked position, re-
|
|||
|
Fig. 49-Front
Seat Frame to Seat Adjuster Bolts
|
|||
|
|
|||