|
1949 Delco Brakes Service Manual (Courtesy of Pat Gizz) |
|||
|
DELCO BRAKE SERVICE MANUAL |
|||
|
|
|||
|
1. Jack up all four wheels in safe manner.
Remove front and rear
wheels and drums. Clamp wheel
cylinder pistons in place with wheel cylinder clamp (See Figure 20). Disconnect
parking brake cable at front
end. The 1939 through 1949 cars have piston stops on the backing plates and it is not necessary to
use wheel cylinder
clamps.
2. Inspect drums for wear or scoring. (Road
dirt, high rivets, etc.,
frequently cut grooves or score
the drums.) The drums or braking surface must be flat and smooth. If drums
are scored or hollow, or out
of round more than .010", they
should be turned or ground. When turning or grinding drums, do not remove
any more metal than is
absolutely necessary. Thin
drums cause squeals, grabbing, chatter, or
pulling. |
6. Inspect and replace all grease retainers
that show any signs of
leakage.
7. Using a small brush apply a thin coat of
Delco Brake Lube to all metal
to metal frictional contact
surfaces such as between the brake shoes and backing plate, between anchor pin
and shoes, and free up
adjusting screw by using Delco
Brake Lube on threads. NOTE: Be careful in applying Brake Lube as the
application in excessive
amounts may result in damaged
linings.
8. Inspect and adjust brake pedal clearance so
that there will be
approximately 1/2" between the
pedal arm and the underside face of toe board or pedal stop. (See "Brake Pedal
Adjustment," Page
18.)
9. Add sufficient quantity of Delco Brake Fluid
to master cylinder reservoir to
bring fluid level up to
approximately 1/2" below the top of the filler plug opening. (NOTE: See
"Brake Fluid," Page
10.)
10. Check brake system for leaks at master
cylinders, wheel cylinders, connections, hose, stop light switch, and lines. If any of the above
parts leak—repair, replace, or
tighten sufficiently to stop leaks.
11. Inspect front backing plates to see that
they are TIGHT to steering
knuckle, and rear backing
plates are TIGHT on axle housing. |
||
 |
|||
|
|
|||
|
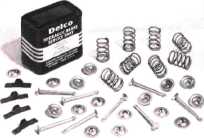
Fig. 23—Delco Shoe Hold Down Kit
3. Remove brake shoes retracting springs using
brake shoe spring removing pliers. Remove shoe hold down springs and retainer cups.
Delco Shoe Hold Down Kits
contain enough pins, springs,
cups, and adjusting hole covers to service a complete car (See Figure
23).
CAUTION: Exercise care that
springs are replaced in exactly the same location as they were before
being removed. Remove adjusting screw spring and secondary shoe
spring, using brake shoe spring removing pliers.
4. Remove shoes. Clean backing plates and all
parts with Declene flushing fluid.
5. Pull back parking brake cables, remove dirt
and grit and lubricate according to car manufacturer
specifications. |
 |
||
|
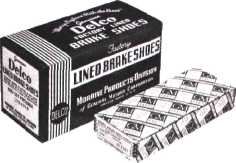
Fig. 24—Delco Lining, And Shoe And Lining
Packages
12. If the linings are worn to
the extent that they are nearly flush with the rivet heads, if linings are
grease or oil soaked, or if the shoes are worn or distorted, brake shoe assemblies
should be replaced or relined as required. It |
|||
|
|
|||
|
17 |
|||
|
|
|||