1942 - 1947 CHEVROLET SHOP MANUAL
Section 12 - Electrical System
|
|
|||
|
12-18
|
|||
|
|
|||
 |
REASSEMBLY OF GENERATOR
After the parts have been thoroughly tested and
inspected, and worn or damaged
parts replaced, reassemble the generator as follows:
Assemble the drive end bearing outside retainer
plate to the drive end frame.
Assemble the drive end
bearing inside retainer plate, gasket, washer,
bearing outside felt washers and
space collar to the end of
the armature shaft. Assemble the drive
end frame and inside retainer
plate to the armature.
New brushes should not
be sanded-in, but should be
assembled to the brush holder so that the center
of the brush contact surface
rests or bears against the
commutator. Brushes furnished through the Parts Department are ground
or machined fiat.
After the generator has run for approximately
10 hours the brushes will have
automatically seated
themselves against the commutator.
Assemble the armature and drive end frame
assembly to the generator frame.
Assemble the commutator end
frame assembly, through bolts
and connect up brush leads.
GENERATOR TESTS
After the generator is
completely assembled, and before it is installed on the car or truck
the following tests should be
made:
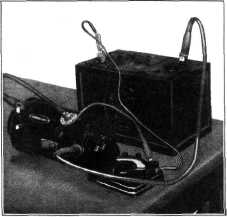
Motoring Generator
With a battery and an ammeter in the circuit
as shown in Fig. 40, connect the
field terminal to ground
with a jumper lead; place one lead on
generator positive terminal and
the other to the
|
||
|
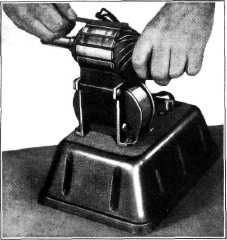
Fig. 38-Armature Test far Short
not vibrate, the armature is O.K. If the saw blade
vibrates, the armature is short
circuited. To determine
whether the armature or the commutator
is shorted, clean out between the
commutator bars and
recheck the armature. If the saw blade still vibrates, the
armature is short-circuited and should be replaced.
|
|||
 |
|||
 |
|||
|
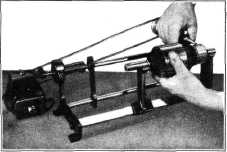
Fig. 39-Undercutting Mica
Armature to
Commutator Leads
Check to see that the armature to commutator
leads are properly soldered to
the commutator.
Commutator
Check the commutator for roughness, and if
rough, turn down on a lathe until
it is thoroughly cleaned
up, after which sand off with 00 sand
paper. Undercut the mica, as shown
in Fig. 39, and again check the armature on the growler.
|
|||
|
Fig. 40-Motoring Generator
|
|||
|
|
|||