1942 - 1947 CHEVROLET SHOP MANUAL
Section 12 - Electrical System
|
|
|||
|
the opposite direction on the armature shaft. The
tension of the starter pedal
return spring holds the
pinion out of mesh with the flywheel while the
engine is operating.
DISASSEMBLY OF STARTING MOTOR
Before a starting motor is removed from an
engine, certain tests should be
made to be sure that the
starting motor is in need of repair. First check
the battery. If the specific
gravity is below 1.175, the
battery is discharged and should be recharged. Check the battery
ground connection at the frame and clean and tighten if necessary.
Check the battery
terminals. Dirty terminals result in poor connection
between the battery and the electrical units.
They should be cleaned regularly
and the battery washed off with a solution of bicarbonate of soda
and water.
Remove the starting
motor switch and check the
contacts to be sure that they are clean and not burned or
corroded. If after making the foregoing
inspections the starting motor
still does not function,
it should be removed and disassembled.
To disassemble-remove the starting motor
switch, commutator cover band,
through bolts and rear
housing. Remove the field coil to brush lead
machine screws and remove the
commutator end frame
assembly and then remove the armature.
To remove the drive
mechanism, first remove the bolt
on which the shift lever pivots and then remove
the shift lever and drive mechanism.
After the starting
motor has been completely disassembled. Fig. 44, wash all parts,
except the overrunning clutch, in
clean gasoline or cleaning solvent.
TESTING STARTING MOTOR PARTS
Field Coil Test for Continuous Circuit
|
12-21
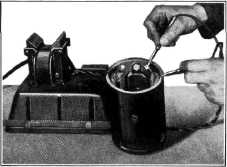
Place the test prod leads on the field coil leads,
Fig. 45. If the test lamp lights,
the field coils are OK. If
the test lamp does not light, there is an
open circuit in one or both of
the field coils.
Field Coil Test for Ground
|
||
 |
|||
|
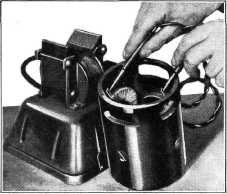
Fig. 46-Field Coil Test for Ground
Place one test prod lead to frame and the other
to the field coil lead, Fig. 46.
If the test lamp does not light the field coils are OK. If the
test lamp lights, one or both
field coils are grounded.
Individual Field Coil Test for Ground
Break soldered
connection between the two field
coils and test each one separately replacing the
field coil found to be grounded.
Field Coil Leads
Inspect the field coil leads where they are soldered
at the starting switch terminal to be sure
that they are tight.
Armature Test for Ground
|
|||
 |
|||
 |
|||
|
|
|||
|
Fig. 45-Field Coil Test for Continuous Circuit
|
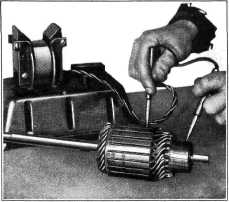
F!g. 47-Armature Test for Ground
|
||
|
|
|||