1942 - 1947 CHEVROLET SHOP MANUAL
Section 1 Body
|
|
|||
|
1-20
|
|||
|
|
|||
 |
The body sill molding is held in place by clips and bolts. One bolt
with the flat retainer in the
molding is used at the extreme front end of the
molding on the front fender skirt,
and two bolts are used
where the molding curves to conform with
the step plate. Clips are used at
all other points of attachment.
To remove any molding, either from the clips
or special retainers, pry the
molding loose at one end
with a thin-blade screwdriver, using a piece of
cardboard or similar material to
prevent the screwdriver
marring the panel finish. If a bolt is used at
the end, remove the bolt. When the
end is free, work the
molding up and down while pulling away
from the clips.
When assembling any molding it should first be
set in proper position, then hook
the top edge over the clips
or special retainer and snap the bottom
edge in place.
REAR COMPARTMENT LID
Alignment Adjustment
Where it becomes necessary to align or adjust
the rear compartment or trunk
lid, due to misalignment,
water leak, etc., the lid flange should
first be inspected carefully for
proper alignment and
smoothness along the underside where the
flange contacts the rubber
weatherstrip. Any un-cvenness
along the underside edge of this flange
should be noted, and if uneven, or
irregular, should be
carefully leveled and formed with a hammer
and dolly so that it will bear
correctly on the compartment
gutter weatherstrip. This hammering
and forming may be done by
applying several strips of
adhesive tape to the painted side of the
flange before the dolly and hammer
are used, to
|
||
|
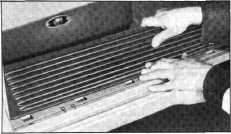
Fig. 41-Removing or Installing Rubber Step Mat
Step Mat Installation
1. Straighten
the mat as necessary to insure that it
will lie flat at all points when
installed on the step.
2. Hold
the mat at about a 45 degree angle, inner
edge up, and position each of the
outer edge catches through
its respective square hole in
the outer edge of the step, Fig.
41. Then force the mat
toward the outer edge of the step while
at the same time pushing it down
into position on the step.
Install the slotted head screws.
NOTE—If the door
sill plate has been removed, it should be reinstalled prior to
installing the step mat; otherwise it will be found difficult to fit
the vertical flange of the sill plate down in place behind the rubber
lip of the mat along the inner edge.
BODY MOLDINGS
The crease line, belt line and body sill moldings
are held in place on the body by
clips, retainers and bolts. Clips, fitted into slots in the
panels, are used to attach the
crease and belt line moldings on the door panels, and special
retainer strips held to the
panels by screws, are used on the quarter panels.
The rear end of the
belt molding is held to the
quarter panel by a bolt, using a flat retainer under
the head to grip the molding, and
a nut which is reached
inside the rear compartment. Rubber
washers and flat washers are used
on the bolt on both sides of the panel to seal against water
leaks. The crease line molding is held to the radius of the rear
quarter panel by two bolts on each side, with lockwashers and nuts on
the inside of the rear
compartment. A special retainer of the same type used on the
quarter panels, holds the crease line
molding across the body back
panel.
The short piece of belt and crease line molding
on the center pillar of sedans is
held by a flat retainer in the molding, and a bolt through the pillar
with the nut on the inside
under the trim.
|
|||
 |
|||
|
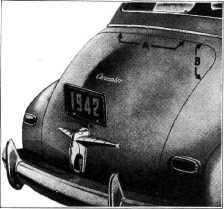
Fig. 42-Checking Rear Compartment Lid Alignment
|
|||
|
|
|||