1942 - 1947 CHEVROLET SHOP MANUAL
Section 7 - Transmission
|
|
|||
|
7-5 |
|||
|
|
|||
|
machined
with a left-hand thread and is locked in place on the clutch gear shaft by being
staked into a hole provided
for that purpose. |
CAUTION-Do not
attempt to DRIVE the shaft out
of the bearing or the bearing will be seriously
damaged.
Disassembly of the Clutch Sleeve
1. Remove the second speed
gear.
2. Remove the first and reverse sliding
gear.
3. Turn the synchronizing ring in the clutch
sleeve until the ends of the
synchronizing ring retainers can be seen through the slot in the
clutch sleeve. |
||
 |
|||
 |
|||
|
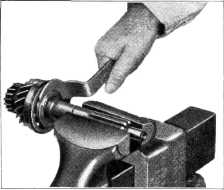
Fig. 6—Retaining Nut and Oil Slinger Removing
Tool
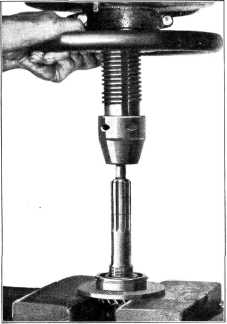
2. To
remove the clutch gear bearing, place the special press plate, J-936, over the gear
and against the bearing. Using
an arbor press, press the
shaft out of the bearing, Fig. 7. |
|||
 |
|||
|
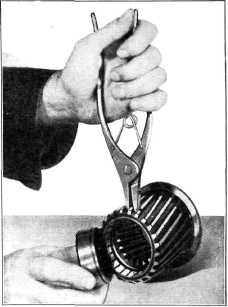
Fig. 8—Removing Synchronizing Ring
from Second and Third Speed Clutch |
|||
|
4. Using
special pliers, J-932, expand the retainer into the counterbore in the clutch sleeve.
This raises the retainer from the groove in the ring, and the ring may easily be slipped out,
Fig. 8.
A complete
layout of the passenger car transmission parts is shown in Fig.
9.
INSPECTION
Wash all
parts of the disassembled transmission in clean gasoline or cleaning
solvent.
Cleaning and Inspection of Bearings
I. Wash
the bearings thoroughly in clean gasoline or cleaning
solvent. |
|||
|
Fig. 7—Removing Clutch Gear Searing |
|||
|
|
|||