1942 - 1947 CHEVROLET SHOP MANUAL
Section 1 Body
|
|
|||
|
1-8
|
|||
|
|
|||
 |
screw and turn the screw clockwise to move the
channel closer to the inner
panel, and counter-clockwise to move it away from the inner
panel.
|
||
|
DOOR GLASS RUN CHANNEL
|
|||
|
Removal
|
|||
|
1. Lower
the glass and remove the door window
garnish molding.
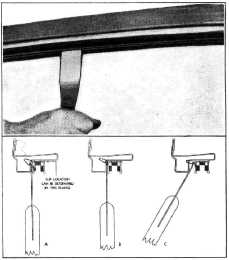
2. Release
the retaining clips located in openings
in the door header and door
pillar by inserting a very
thin-bladed tool between the door reveal
and the channel. Compress the clip
and at the same time pry
out to release the clips from the
door as shown in Fig. 16.
|
|||
 |
|||
|
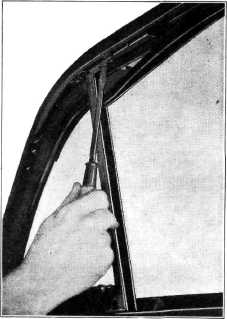
Fig. 15-Division Channel Upper End
|
|||
|
screws attaching the channel to the top of the
window opening.
2. Reassemble
the door glass run channel. Install
the two screws holding the channel
bracket at the lower part
of the window opening.
3. Turn
the channel lower end adjusting screw
clockwise or counterclockwise to
line up the channel with
the door glass. Move the channel
fore or aft to produce proper side
clearance for the door
glass. Install the shakeproof lockwashers
and nut on the adjusting screw and
tighten securely.
4. Reassemble
door trim pad, arm rest, regulator
handles, door remote control
handle and the garnish
molding.
Division Channel Adjustment
The division channel adjusting screw hole in the
door inner framework is elongated
fore and aft, Fig. 13. To adjust or produce proper side clearance
for the door glass, loosen the nut on the channel
adjusting screw and move the channel and screw forward or
backward at the lower end as
necessary.
To move this channel away from or closer to the
door inner panel to produce
proper alignment with the
door glass, loosen the nut on the adjusting
|
|||
|
Fig. 16-Removing Run Channel Clips
3. Remove
the door trim pad, also the hand hole
cover from the door inner panel.
Through the hand hole,
loosen the retaining screw at the bottom
of the channel (do not remove the screw).
4. Carefully
release the channel at the top of the
door window opening and pull it
out.
Replacement operations are the reverse of the
foregoing.
|
|||
|
FRONT DOOR VENTILATOR
|
|||
|
Removal
|
|||
|
1. Remove the door
window garnish molding, door lock remote control handle, both
regulator handles, and loosen the trim pad along the top and down
each side about twelve inches.
|
|||
|
|
|||