1942 - 1947 CHEVROLET SHOP MANUAL
Section 7 - Transmission
|
|
|||
|
7-8 |
|||
|
|
|||
|
2. Check the bushings for
excessive wear by using a narrow feeler gauge between the shaft and the
bushings. The proper clearance is from .002" to
.004". |
of the shaft engages the clutch
housing when the transmission is installed in the chassis, and keeps the
countershaft from turning. This flat must be horizontal and at the top or
the transmission cannot be assembled to the clutch
housing.
NOTE—The step at the end of the
countershaft should be flush with the front face of the case, or
approximately 1 64" below the face, to maintain proper transmission
alignment.
Rear Bearing
1. Install the rear bearing lock ring in the
case.
2. Start the bearing in from the rear, and use
the lock ring expanding tool,
J-935, to expand the ring into
the case.
3. Using a soft steel drift, tap the bearing on
the outer race until it is in
about halfway; then remove the
lock ring expanding tool and continue to tap the bearing until the lock
ring seats in the groove in the
bearing.
Synchronizing Clutch Sleeve Assembly
1. Install the synchronizer ring retainers in
the counterbores in the ends of
the clutch sleeve.
2. With the special pliers. J-932. expand the
retainer, at the same
time holding it flush with the
back face of the cone. Install the synchronizer rings, making sure that the retainers
seat in the groove all the way
around the rings. Fig.
S.
3. Install the first and reverse sliding gear
on the clutch
sleeve.
4. Install the second speed gear in the rear
end of the clutch sleeve,
meshing the clutch teeth on the
gear with the internal teeth in the clutch sleeve.
5. Coat the grooved side of the second speed
gear thrustwasher with transmission lubricant and place the washer on the back face of the
second-speed gear. Then
install the clutch gear assembly in the transmission
case.
Mainshaft
1. For initial lubrication, place
transmission lubricant on the second-speed gear bearing area of the
mainshaft. When installing the mainshaft, the lugs on the front
synchronizer must slide through the slots in the mainshaft spline. Push
the shaft into the clutch sleeve as far as possible by hand, picking
up the second-speed gear and thrustwasher. |
||
|
REASSEMBLY |
|||
|
Reverse Idler |
|||
|
1. Lubricate the reverse idler gear
thrustwashers and install the
gear and thrustwashers in the case with the gear having the chamfered
teeth to the rear of the
case.
2. Install the idler shaft, making sure that
the lock pin hole in the shaft
lines up with the hole in the
case at the same angle, Fig. 11.
CAUTION—A pin punch should be
used to make sure that these holes line up, for if the lock pin is driven
into the case and shaft with the hole in the shaft at the wrong angle
serious damage will result.
3. Use a new idler shaft lock pin and drive it
in approximately 1/16" beyond
Hush with the case, and peen
the hole slightly. This lock pin must be a tight fit in the case to prevent oil
leaks.
4. Install the idler shaft expansion plug in
the case.
Countergear
1. Install the countergear in the case;
lubricate the forward thrust
washer and install it between the countergear and
case.
2. Feed the assembly tool, K-386, in from the
front, picking up the forward
thrustwasher and
countergear.
3. Lubricate the rear thrustwasher and slip it
between the countergear and
case, picking it up with the
assembly tool.
4. Lubricate the countershaft and install it
from the front, pushing the
assembly tool out with the
shaft. Fig. 12. The flat on the forward end |
|||
 |
|||
|
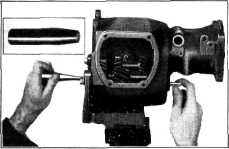
Fig. 12—Countershaft Assembly
Tools |
|||
|
|
|||